CNJ Models in HO > Kitbashes >
Up | B and E series switchers | G3 Pacific | M2/3 Mikado | K1 and I5 camelback | RS3/RSD4-5 Alco switchers | Boxcab
Upgrades to
Aristocraft Boxcab - by Alan Mende
[Download
a pdf of this upgrade]
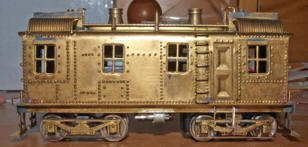
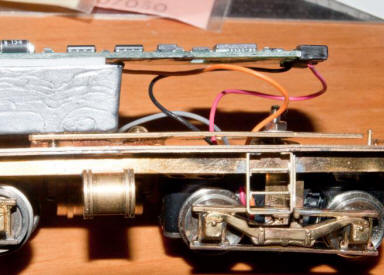
When I got the old Aristocraft boxcab model, it
was missing the stirrup steps below the doors; the bell was a poor
representation of what the prototype had; it was missing the stack for the cab
heater (a coal stove), and there was no whistle on the roof. Additionally, the
headlight castings were pretty poor and the sand fill hatches looked more like
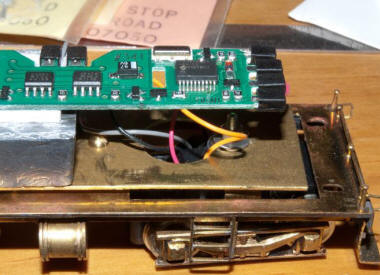
steps than hatches. Since I had converted my layout to DCC operation, I wanted
to update the model accordingly and remotor it as well.
-
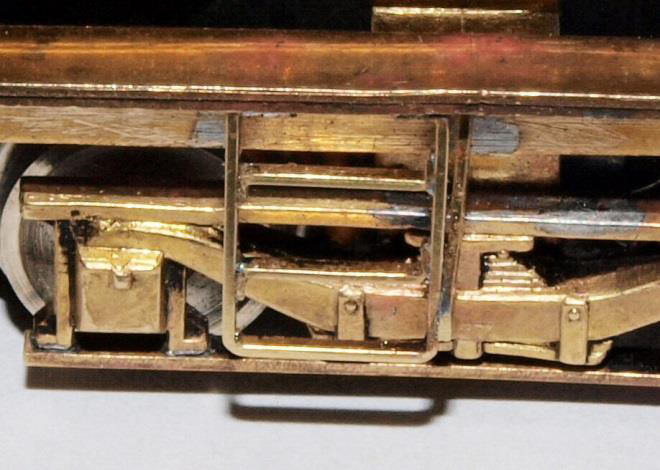
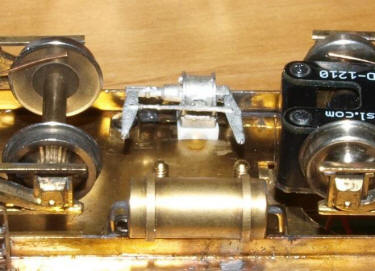
Disassemble model completely.
-
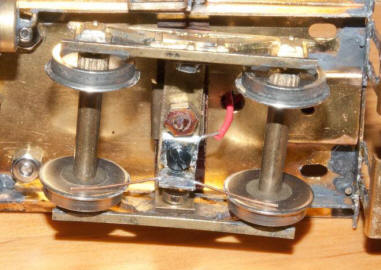
Disassemble powered truck. All you
need are the sideframes, but leave them connected to each other.
-
Make a new sideframe bracket that
will mount to the top of the Stanton drive and center the sideframes on the
drive axles.
-
Make the NWSL Stanton drive
mounting plate from K&S 1” by .032” sheet. I had to shim it up to get the
Stanton drive even with the mounting of the dummy truck. I drilled a ˝” hole
in the mounting plate to accommodate the wires from the Stanton drive. By
the way, I had to cut down the weight so the decoder board didn’t touch the
top inside surface of the carbody.
-
Either purchase an unpowered
Stanton drive or add wiper contacts the original dummy truck. Note that the
wipers are in contact with the insulated wheelsets and also from the rest of
the body.
Adding and Revising Details
-
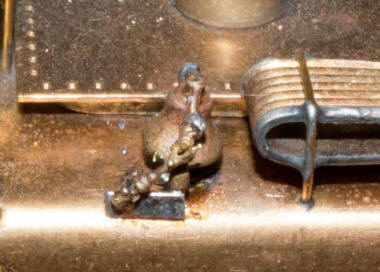
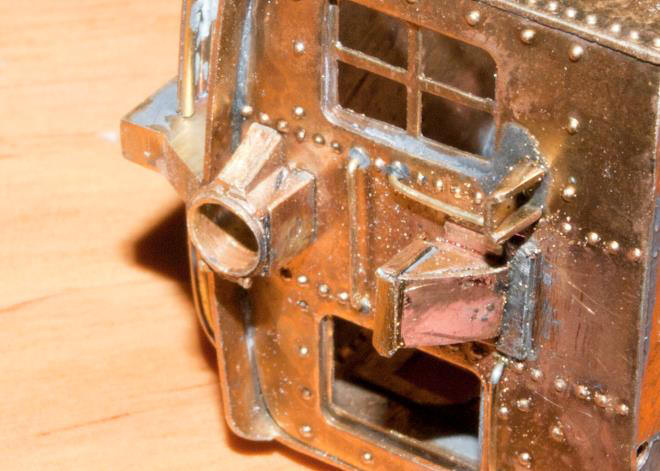
Remove the bell and replace with a
Cal-Scale No. 317 Squat Base Modern Bell. It needs to be modified because
the prototype bell had the sir ringer mechanism at an angle. I separated the
bottom of the mechanism from the bell yoke and gently bent it. I added a
piece of brass strip as shown in the photos.
-
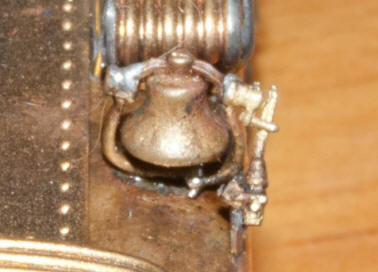
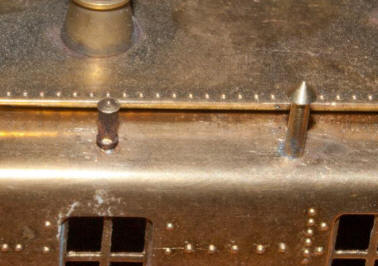
Add a Custom Finishes No. W103
Whistle as shown. The heater stack on my model was missing, so I turned one
of my own.
-
I replaced the headlights with
Cal-Scale No. 206 castings that I drilled out. The mounting brackets are
made from K&S rectangular tubing.
-
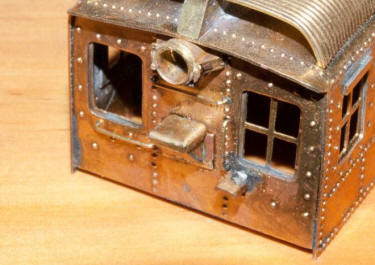
That “thing” below the headlight
is a crude representation of a sand fill hatch. I closed off the front of it
and added a cover to the top as well as a short strip of brass strip at the
bottom for a flange. (See the previous photo and the following one.)
-
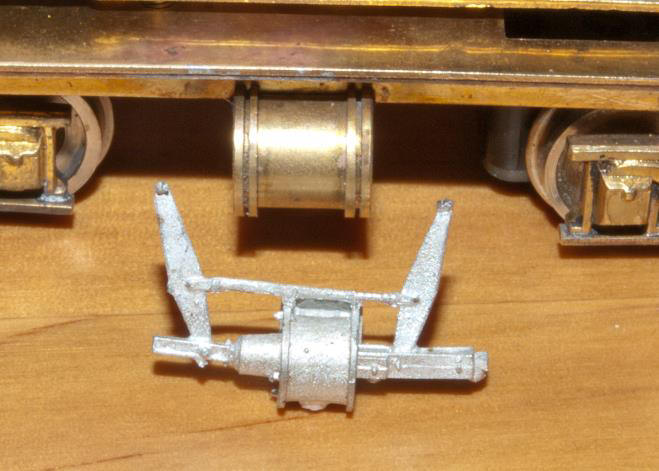
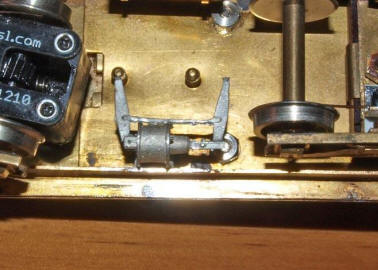
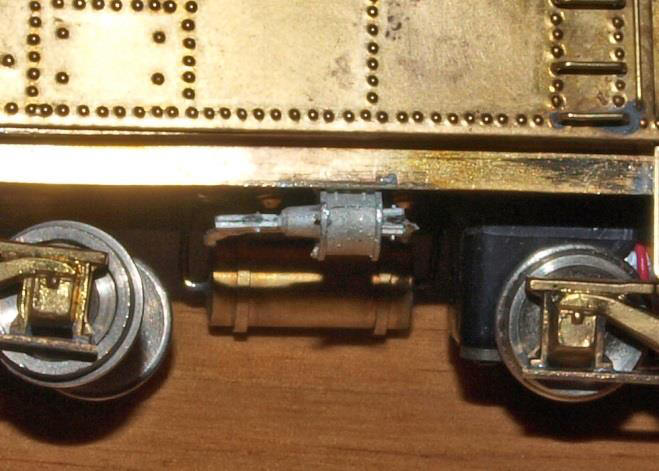
The short flanged cylinder on the
frame represents the brake cylinder. I replaced it with a passenger car
brake cylinder from a Custom Finishes No. 312 PC Pass Brake set. I
determined it was the correct size by photo-reducing an image from Model
Railroader Cyclopedia – Volume 2; Diesel Locomotives and comparing the
Custom Finishes part to the reduced photocopy. As the cylinder comes out of
the package, the brake levers are on the wrong side, so I carefully cut them
off and moved them to the other side. I mounted the cylinder on a short
piece of Evergreen 3/16” channel and glued the assembly in place with CA.
-
The stirrup steps below the side
doors were missing on my model so I fabricated my own.